Setting up Capturly for your Woocommerce-based webshop is basically a snap. To install it, all you have to do is copy the tracking code and follow the steps below.
To obtain your tracking code, log in to your Capturly account and go to website settings on your website’s dashboard.
The Capturly tracking code should look like this:
<script>
function trq(){(trq.q=trq.q||[]).push(arguments);}
trq(‘account’, ‘EXAMPLE‘);
var _paq = _paq || [];
_paq.push([‘trackPageView’]);
_paq.push([‘enableLinkTracking’]);
(function() {
var u=”//capturly.com/”;
_paq.push([‘setTrackerUrl’, u+’capturly-track.php’]);
_paq.push([‘setSiteId’, ‘2’]);
var d=document, g=d.createElement(‘script’), s=d.getElementsByTagName(‘script’)[0];
g.type=’text/javascript’; g.async=true; g.defer=true; g.src=’/capturly-track-js.js’; s.parentNode.insertBefore(g,s);
})();
</script>
Note: The code in the gray box above is for demonstration purposes only. Keep in mind that you will have a unique code between the apostrophes instead of EXAMPLE.
STEP 1 Log into your WordPress account with your e-mail address and password
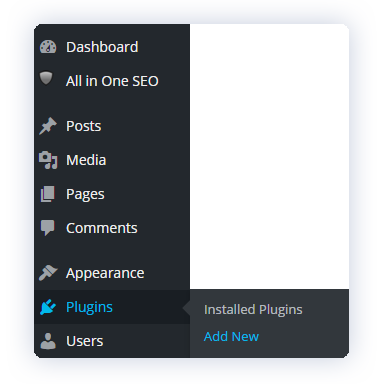
STEP 2 From the menu on the left choose Plugins -> Add New

STEP 3 In the Search bar on the right of the screen, type in ‘Capturly’ and hit Enter
STEP 4 Click on the ‘Install Now’ button

Note: Ensure that you have Capturly installed
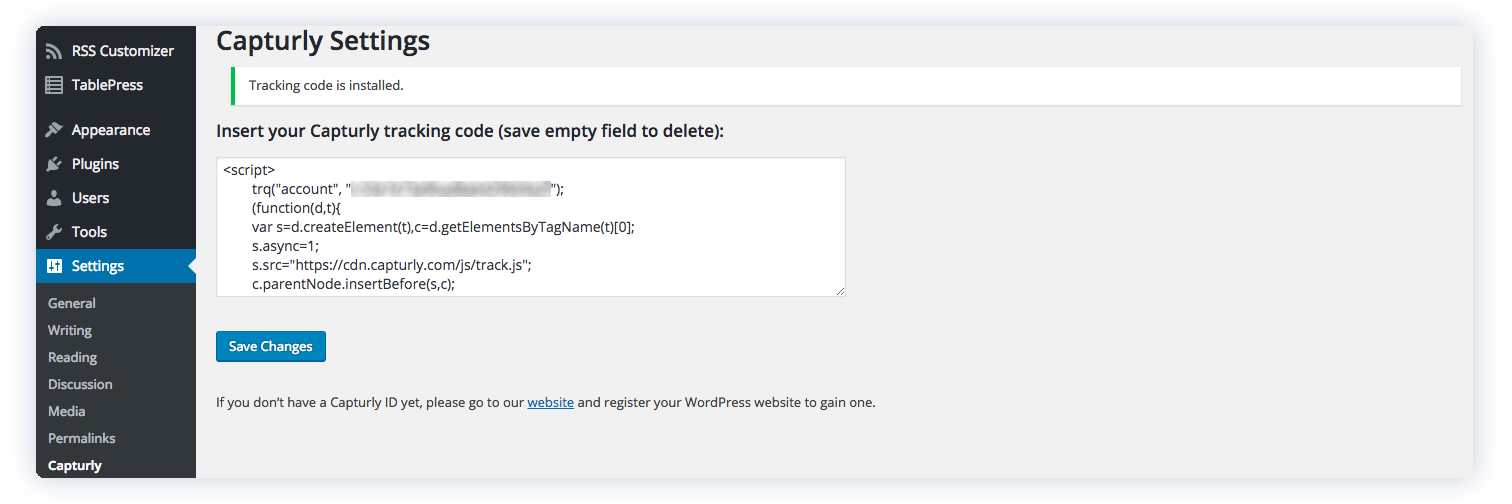
STEP 4 Choose ‘Settings’ menu from the sidebar, then click on ‘Capturly‘

STEP 5 Once you’ve pasted your tracking code into the box as it’s shown in the picture above, click on Save Changes.
Note: After performing the steps, a message saying “Tracking code is installed” appears.
Congratulations, you’ve successfully installed the Capturly plugin on your website! Now you can collect valuable visualized data by monitoring the traffic on your site.
In case you don’t have a Capturly account, you can obtain your FREE trial after registering here. Start your journey today.
Don't forget, sharing is caring! :)

