Installing Capturly for your Opencart-based webshop takes only a couple of minutes. In order to get it up and run it, all you have to do is to copy the tracking code and follow the steps below.
To obtain your tracking code, log in to your Capturly account, and go to Website Settings on your website’s dashboard page.
The Capturly tracking code should look like this:
<script>
function trq(){(trq.q=trq.q||[]).push(arguments);}
trq(‘account’, ‘EXAMPLE‘);
var _paq = _paq || [];
_paq.push([‘trackPageView’]);
_paq.push([‘enableLinkTracking’]);
(function() {
var u=”//capturly.com/”;
_paq.push([‘setTrackerUrl’, u+’capturly-track.php’]);
_paq.push([‘setSiteId’, ‘2’]);
var d=document, g=d.createElement(‘script’), s=d.getElementsByTagName(‘script’)[0];
g.type=’text/javascript’; g.async=true; g.defer=true; g.src=’/capturly-track-js.js’; s.parentNode.insertBefore(g,s);
})();
</script>
Note: The code in the gray box above is for demonstration purposes only. Keep in mind that you will have a unique Capturly ID between the apostrophes instead of EXAMPLE.
Method 1 – Using Opencart’s Admin panel:
STEP 1 Log in to your Opencart account, then download the Capturly plugin from here
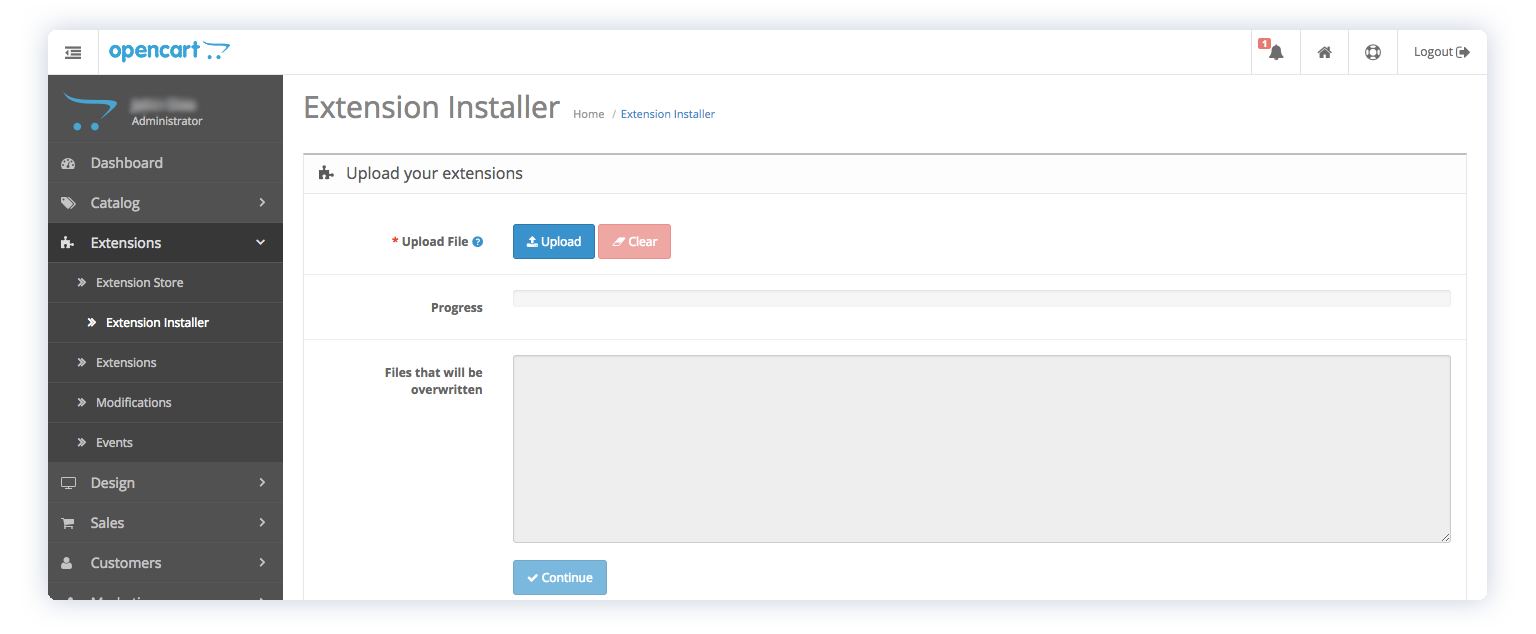
STEP 2 In your Opencart admin panel, go to Extensions -> Extension Installer

STEP 3 Click on the blue Upload browse the “opencartplugin.ocmod.zip” archive you downloaded
STEP 4 Click on the blue Continue button under the gray text box
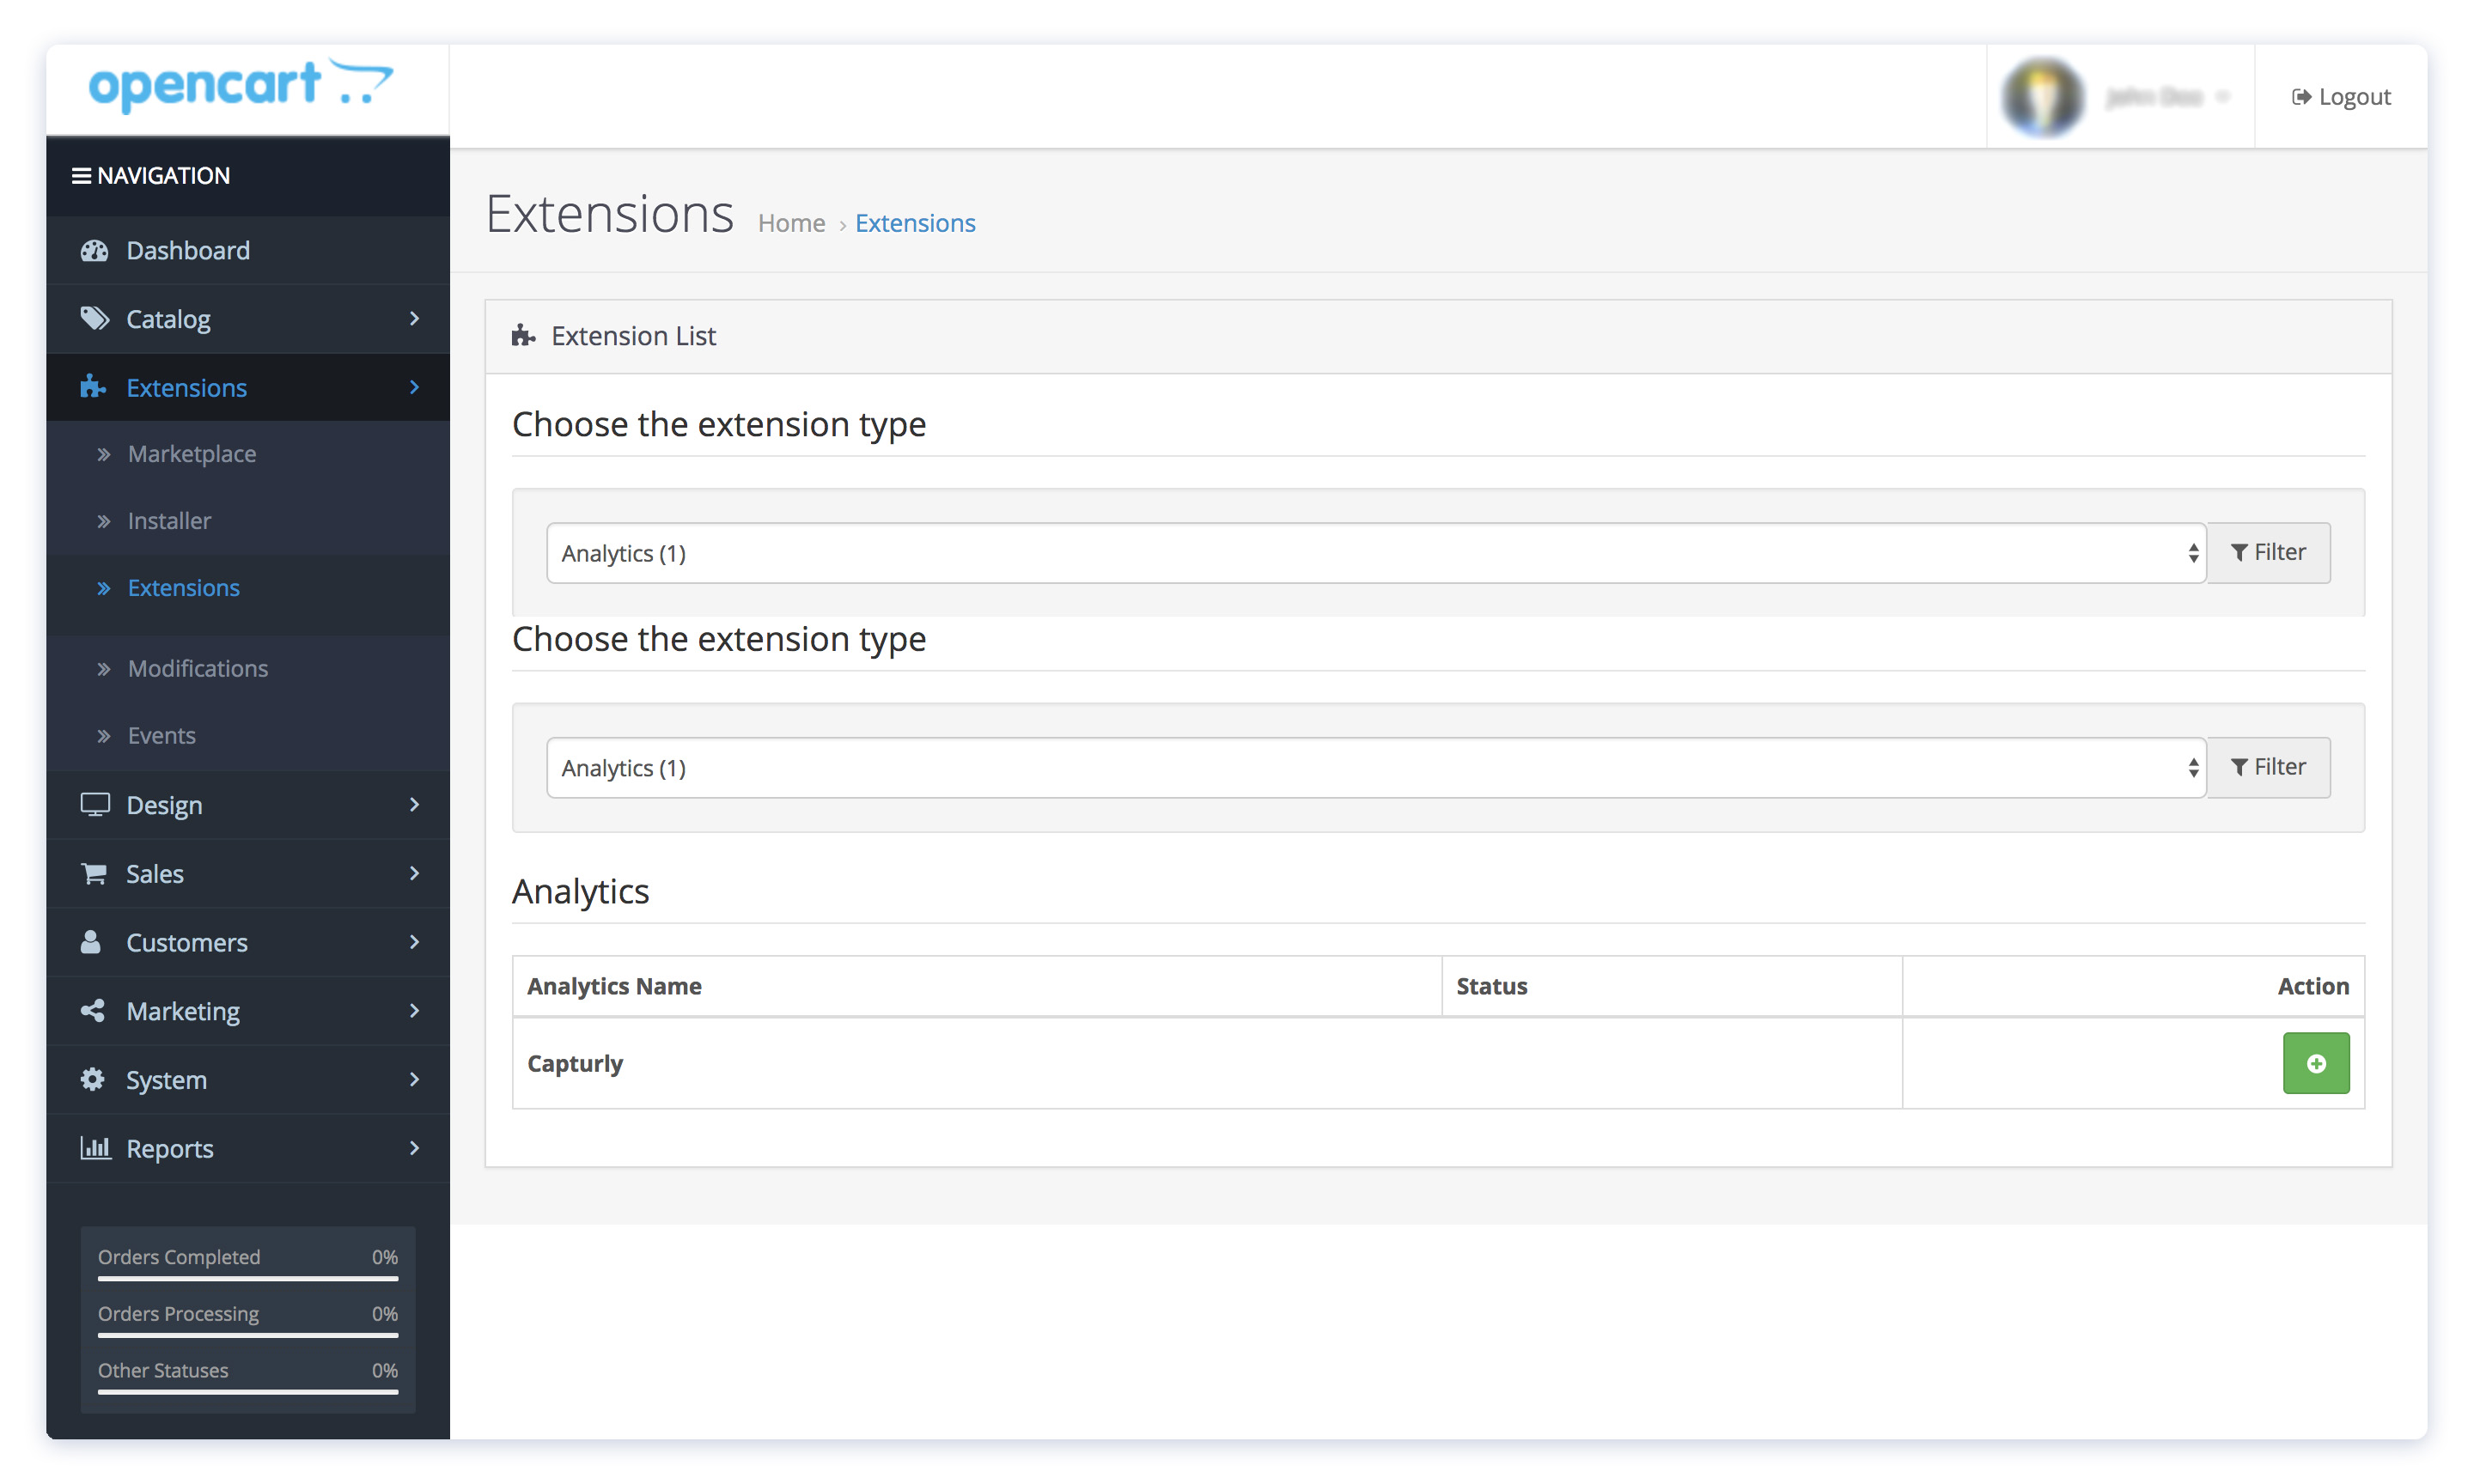
STEP 5 Head to Extensions -> Extensions and click on the green “+” icon

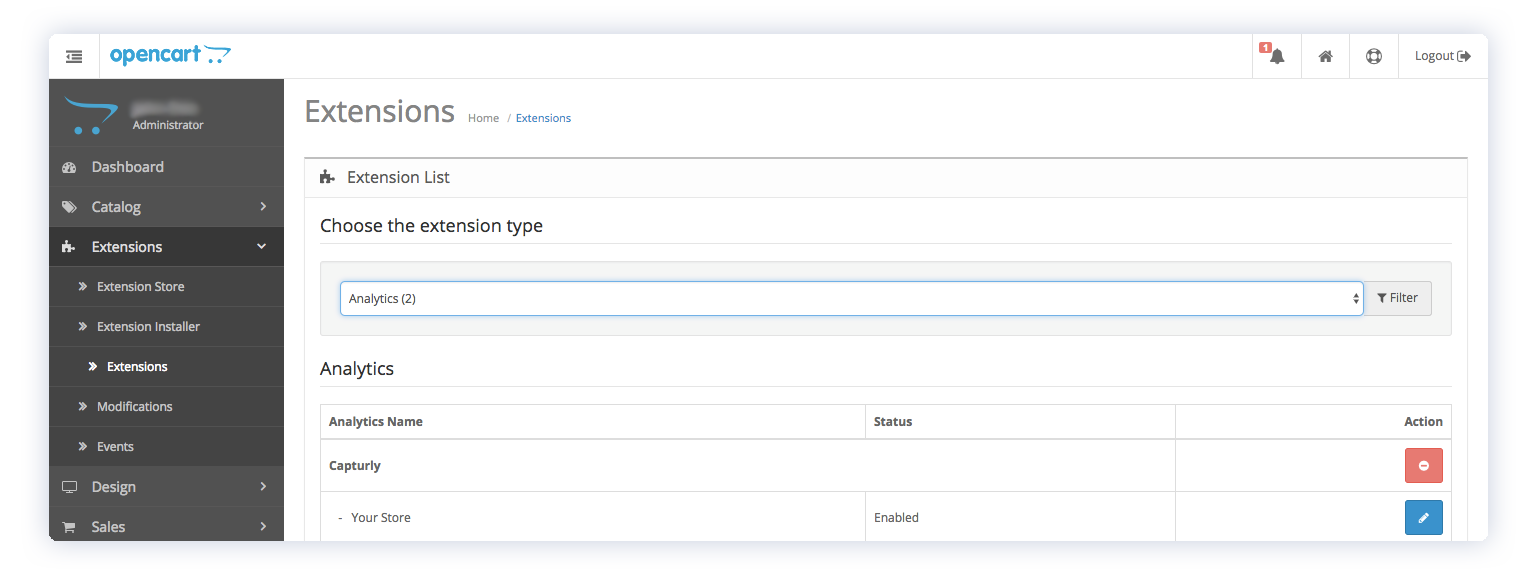
STEP 6 If you click on the blue edit icon on the right, you can paste your Capturly tracking code in the text box.


Note: In case you wish to double-check if you have installed the plugin properly, you can do so by clicking on the Extensions submenu, then you should see “Enabled” under Status.
Method 2 – Using FTP:
You can also install Capturly by uploading the plugin through FTP.
STEP 1 Create an FTP user in a Virtual Server environment using the control panel
STEP 2 Download the Capturly plugin from here
STEP 3 Upload the contents of opencartplugin.ocmod.zip to the root directory of your Opencart install
Note: In case of operating Opencart in a VPS environment, you have to create an SFTP connection using the SSH access that comes with the VPS. You can do this using Total Commander or FileZilla, but the Bitvise SSH client does this automatically for you. After successfully uploading, the extension will appear under Extensions -> Extensions menu in your Opencart admin panel.
Congratulations! Now you are able to collect valuable visualized data and see what your visitors are doing on your website.
In case you don’t have a Capturly account, you can obtain your FREE trial after registering here. Start your journey today.
Don't forget, sharing is caring! :)


2 Comments
Sophie
2017-08-23 at 13:54Thanks for your feedback it’s really motivating! Have a great day! Cheers
Susanna
2021-11-11 at 16:41I dont comment often but I really liked this read.
Susanna