
What do I need to start using Capturly?
If you have already registered to Capturly, the first thing you have to do is installing the Capturly tracking code to your website. After the code is installed and the first visitors are tracked, you can gain access to all of the features available in your plan.
How can I install Capturly’s tracking code?
You can find your tracking code by following these steps:
STEP 1 Log in to your Capturly account and go to the Settings under your email address in the right top corner.STEP 2 Select your desired website that you wish to gather data from in the left column
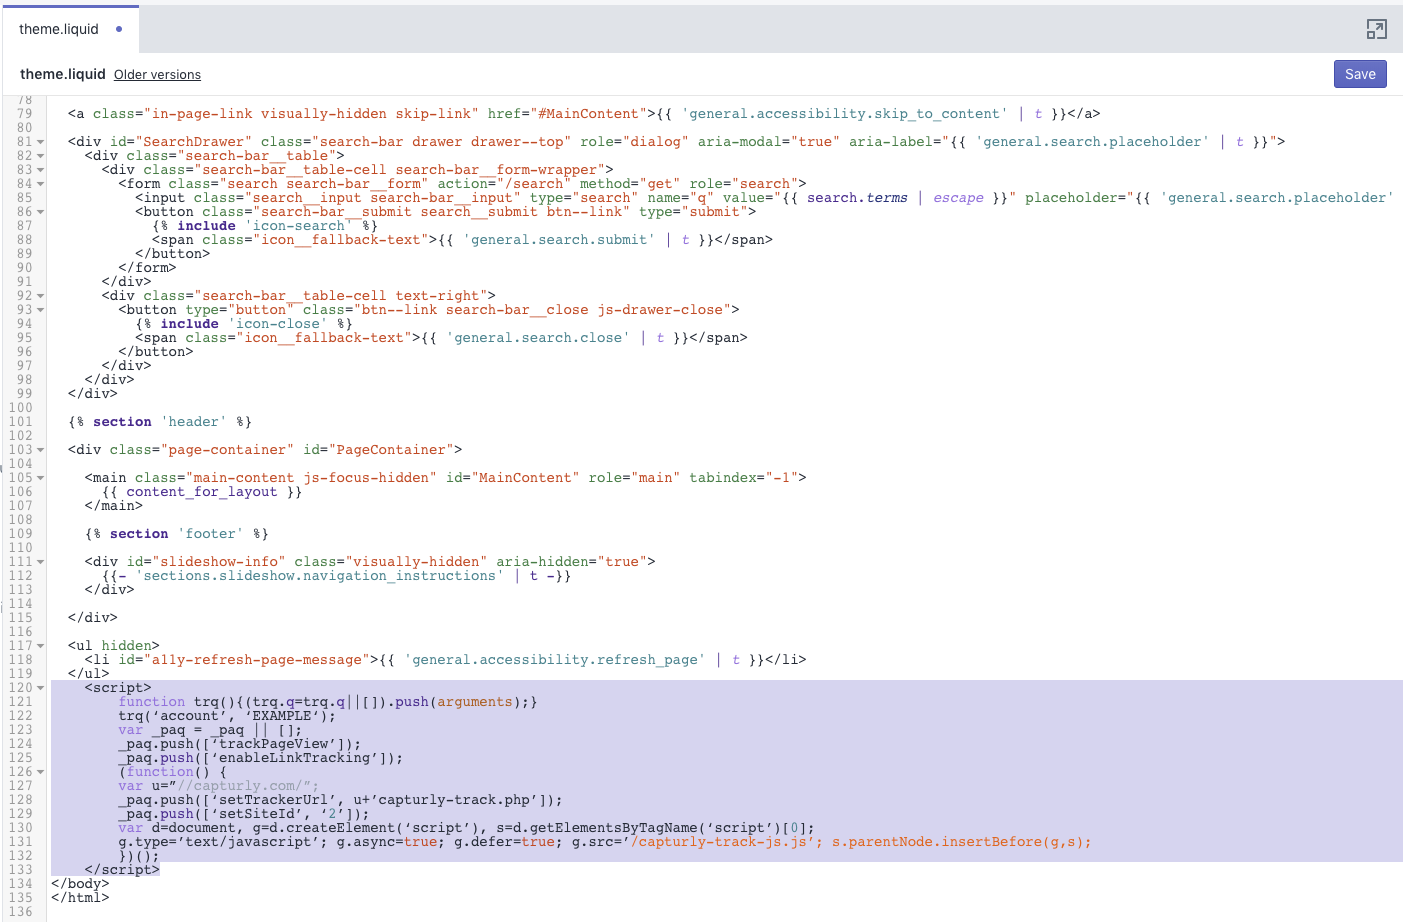
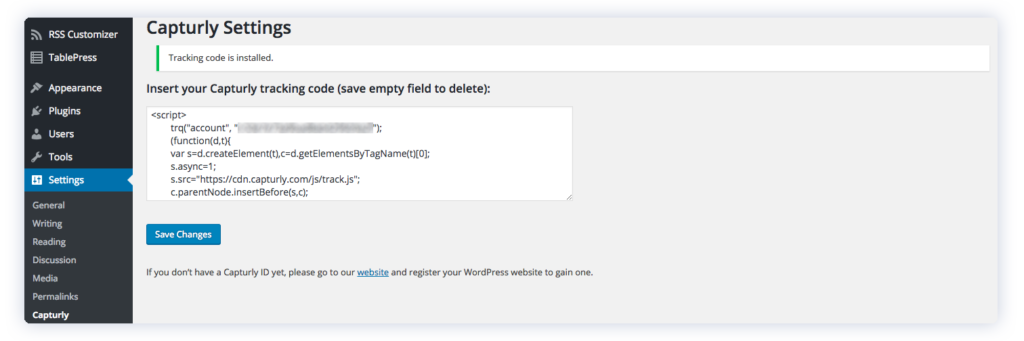
STEP 3 Scroll down to the bottom of the Website Settings page until you see your tracking codeYour Capturly tracking code will look like this:
![]()
Capturly’s tracking code is installed, but no data has appeared yet.
You might encounter an issue where Capturly’s tracking code is already installed, but you still cannot access your website’s visitor data. This happens when there was no trackable visitor activity on your website from when you installed the tracking code until recent observation. Do not worry as you will have access to your website analytics data after the first visitors are tracked.
Additionally, keep in mind that Capturly updates website metrics a few times a day depending on your subscription. If you’ve recently set up Capturly or are waiting for new data, there may be a short delay before the information appears. Check back after some time has passed or reach out to our support team if you need further assistance.
How to implement Capturly with Google Tag Manager
Google Tag Manager is a free tool that allows you to manage and deploy code snippets or tracking pixels on your website without having to modify the code of it. This basically means you only need to add one code snippet (the snippet of Google Tag Manager) to your website first and after this step, you can handle every other snippet from the admin dashboard without managing your code.
If you are not familiar with Google Tag Manager yet, here you can find the official quick start guide. It will tell you how you can set up a Google Tag Manager account and implement it on your website.
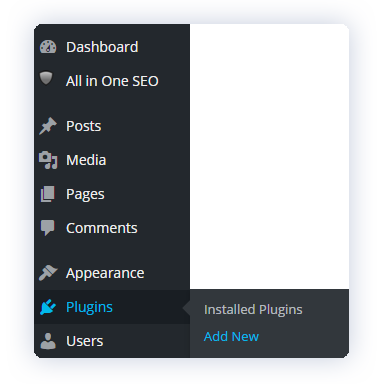
If the Google Tag Manager is implemented on your website, please follow these steps to add the Capturly tracking code to your website with it:
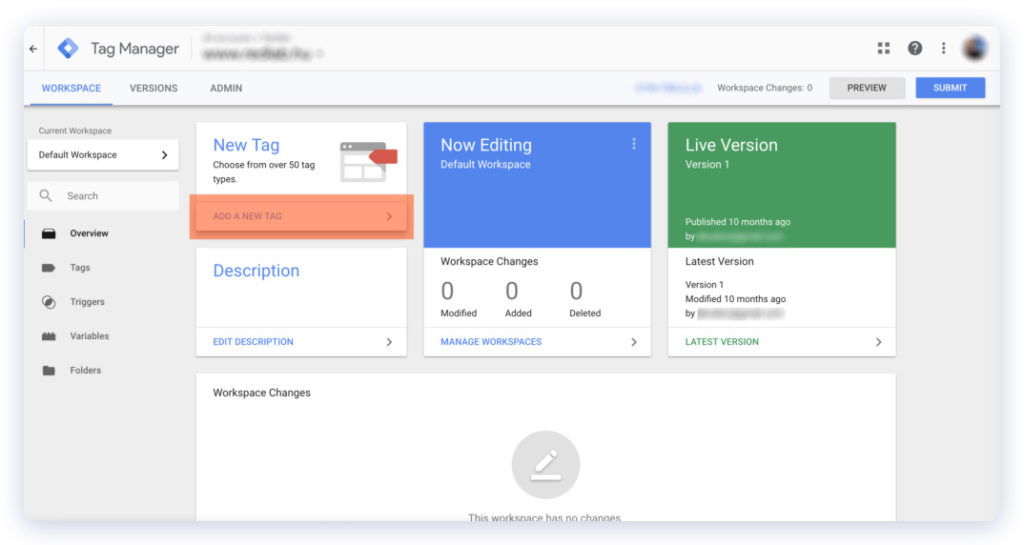
STEP 1 Click on the Add new tag on your main Google Tag Manager dashboard
STEP 2 Name your tag and choose the <>Custom HTML tag type
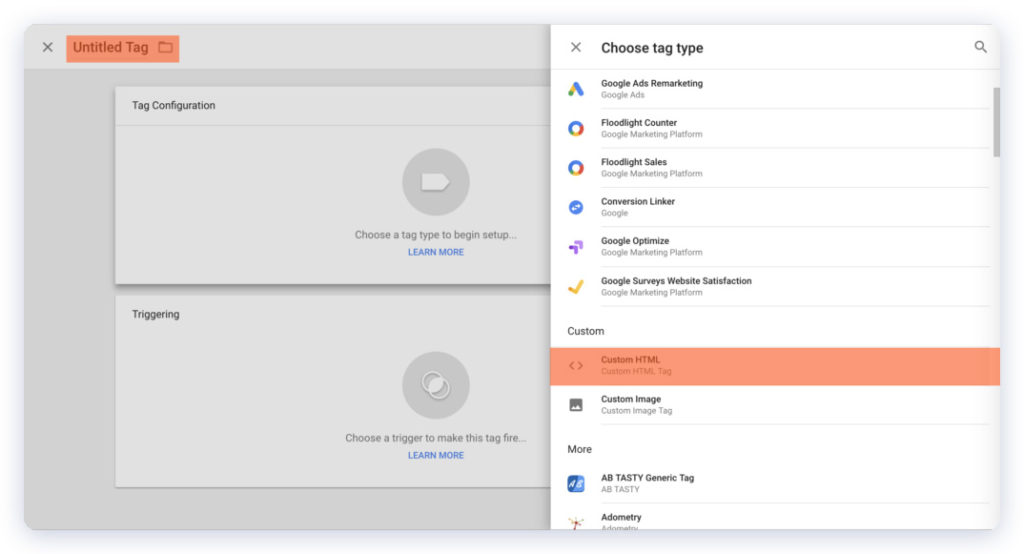
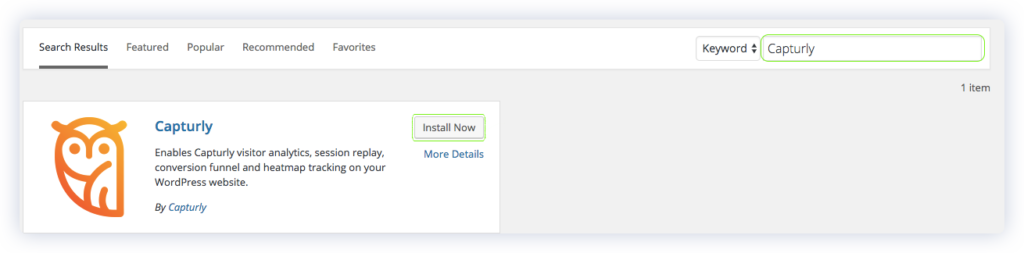
STEP 3Add the Capturly tracking code to the <>Custom HTML field
![]()
Can I use Capturly on a webshop?
Capturly supports all the major webshop engines. We have plugins for Magento, Shopify, WooCommerce and Opencart 2.0. You can install Capturly after downloading and installing it on the chosen platform.
- I wish to install Capturly on Magento.
- I wish to install Capturly on Shopify.
- I wish to install Capturly on WooCommerce.
- I wish to install Capturly on Opencart.
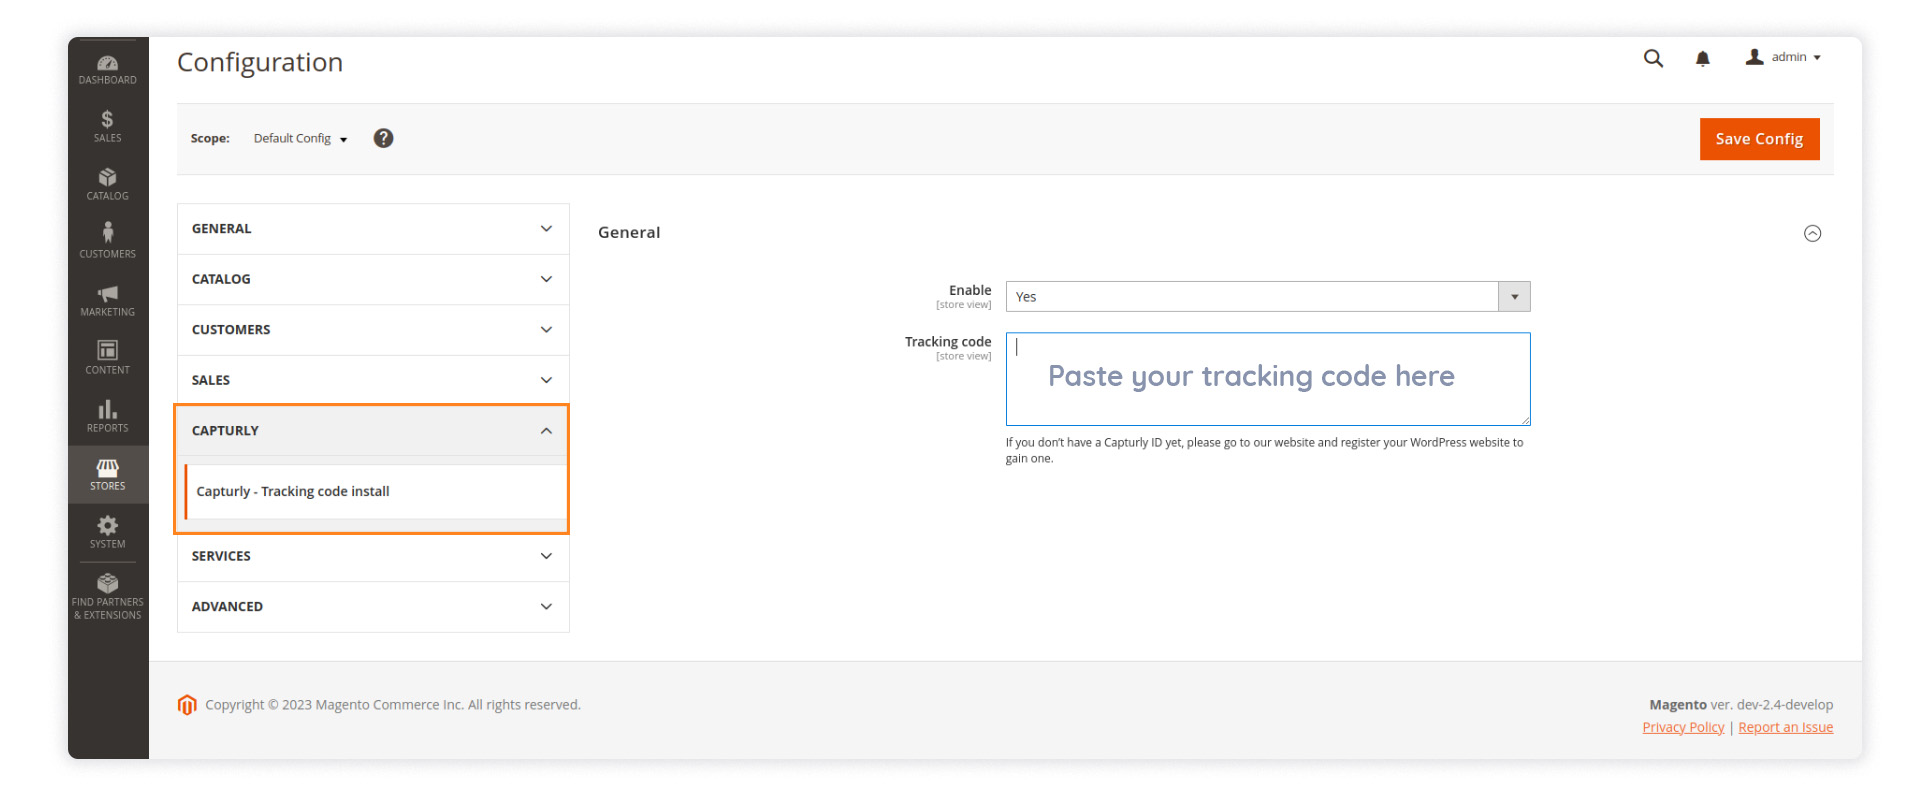
How to implement Capturly on Magento 2.+?
After you install your Magento plugin all you have to do is to configure it. Setting up Capturly for your Magento-based webshop takes only a couple of minutes. In order to get it up and running, copy the tracking code and follow the steps below.
To obtain your tracking code log in to your Capturly account and copy your tracking code from the Welcome Page .
Your Capturly tracking code will look like this:
![]()
How to implement Capturly on Shopify?
Setting up Capturly for your Shopify-based webshop is basically a snap. To install it, all you have to do is copy the tracking code and follow the steps below.
To obtain your tracking code log in to your Capturly account and copy your tracking code from the Welcome Page .
Your Capturly tracking code will look like this:
![]()
How to implement Capturly on WooCommerce?
Setting up Capturly for your Woocommerce-based webshop is basically a snap. To install it, all you have to do is copy the tracking code and follow the steps below.
To obtain your tracking code log in to your Capturly account and copy your tracking code from the Welcome Page .
Your Capturly tracking code will look like this:
![]()
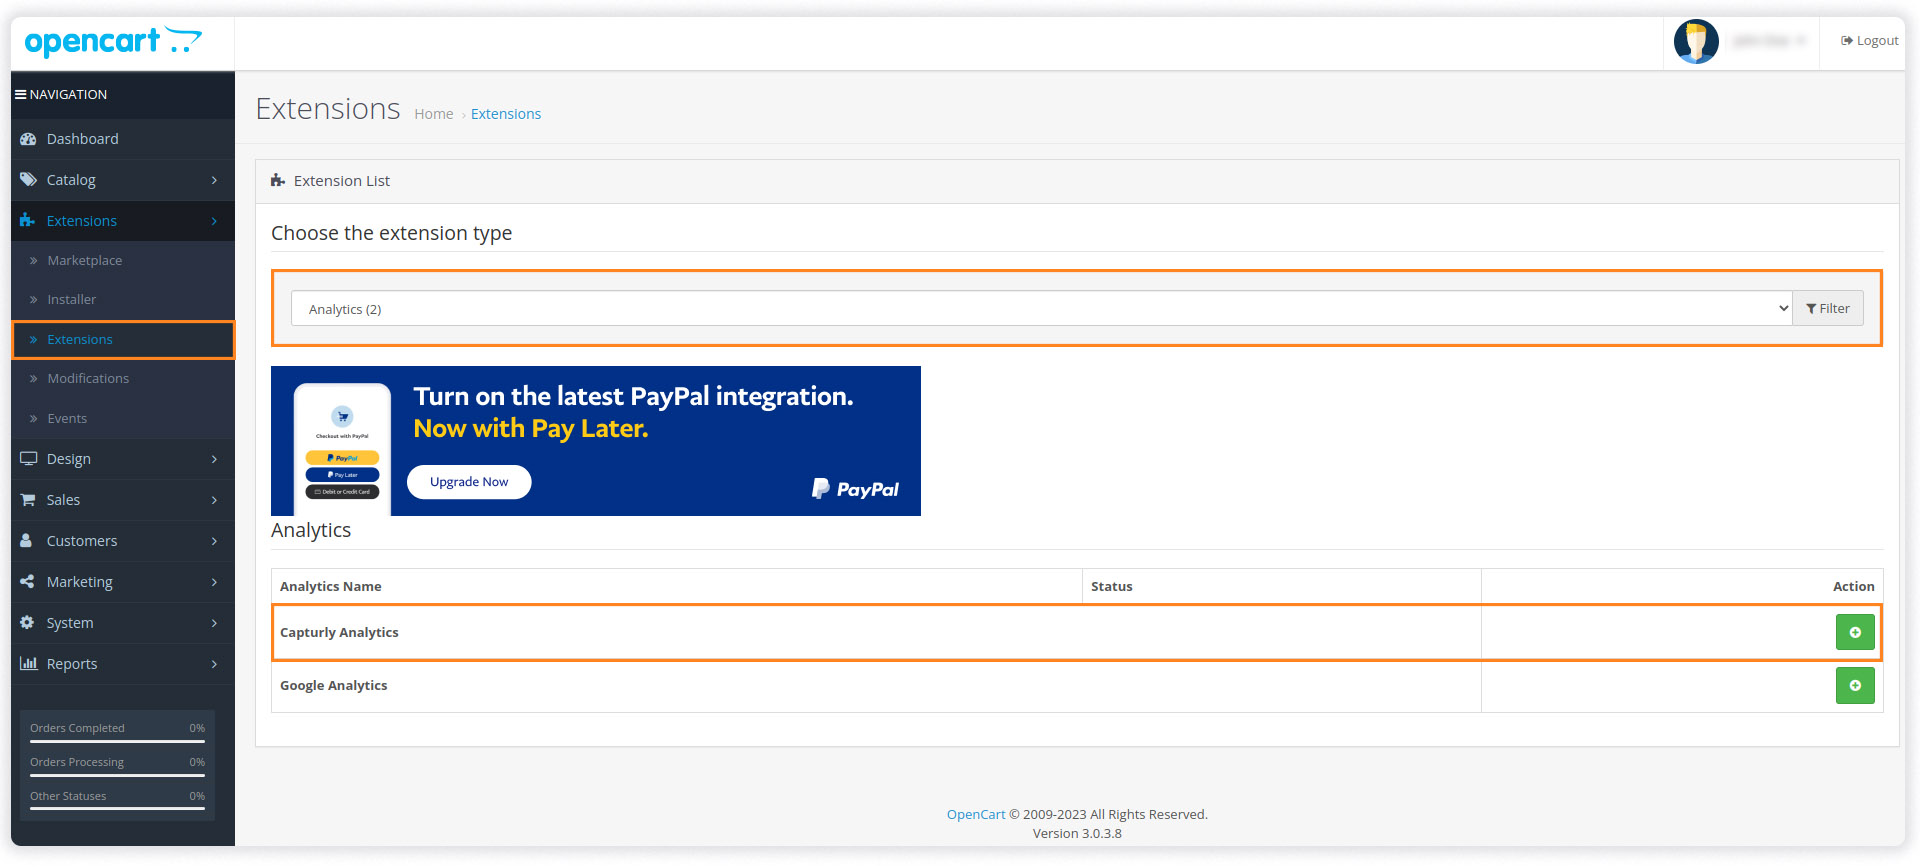
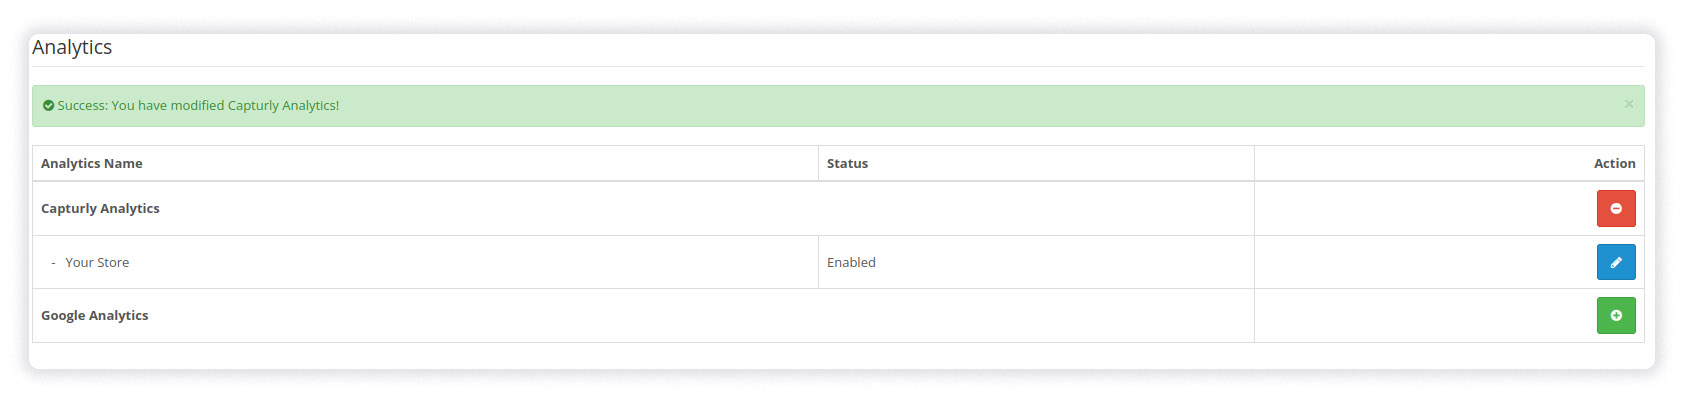
How to implement Capturly on Opencart?
Setting up Capturly for your Woocommerce-based webshop is basically a snap. To install it, all you have to do is copy the tracking code and follow the steps below.
To obtain your tracking code log in to your Capturly account and copy your tracking code from the Welcome Page .
Your Capturly tracking code will look like this:
![]()
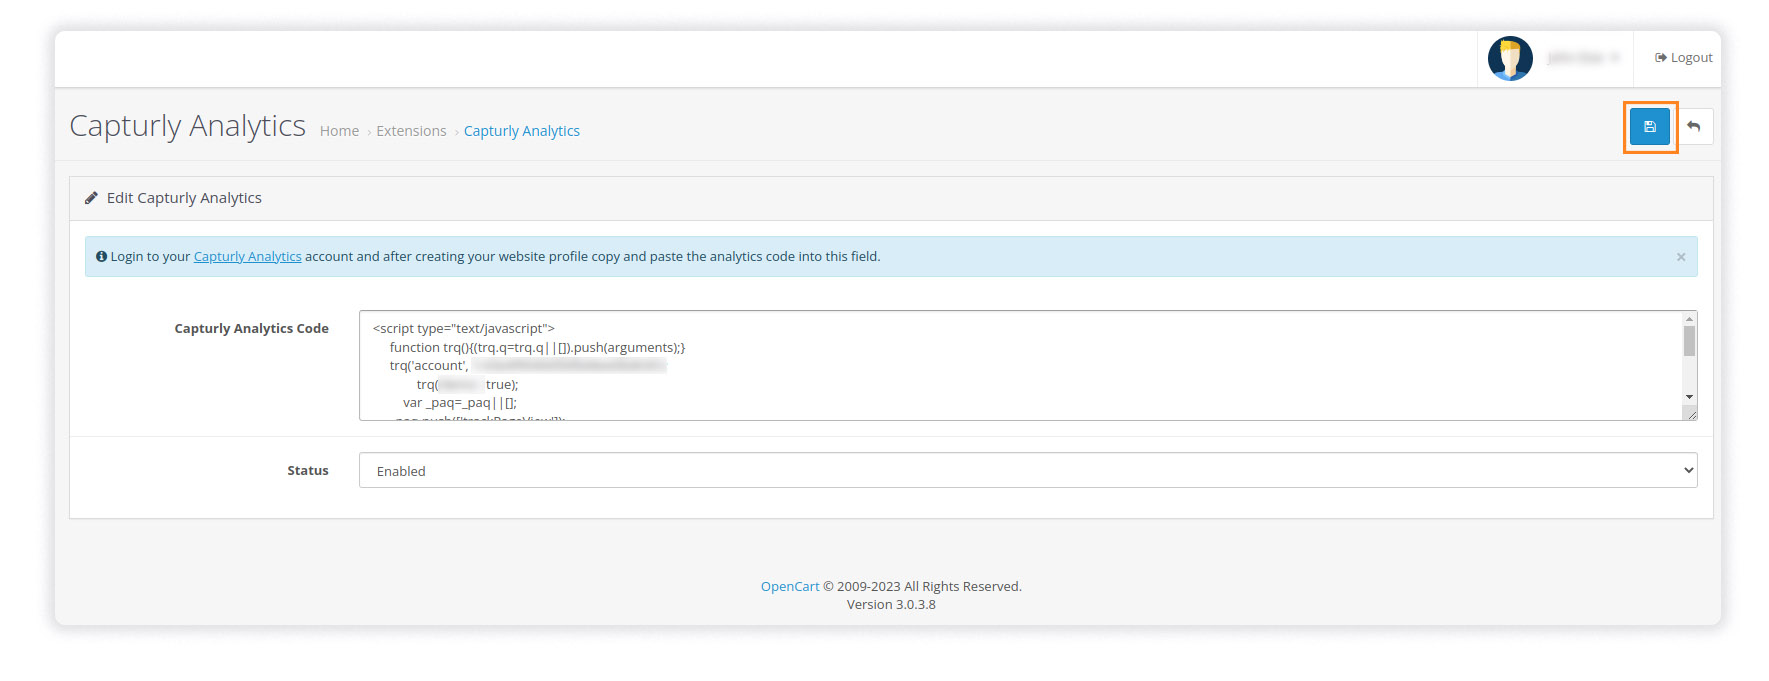
Method 1 – Using Opencart’s Admin panel:
STEP 1 Log in to your Opencart account, then download the Capturly plugin for Opencart STEP 2 In your Opencart admin panel , go to Extensions -> Installer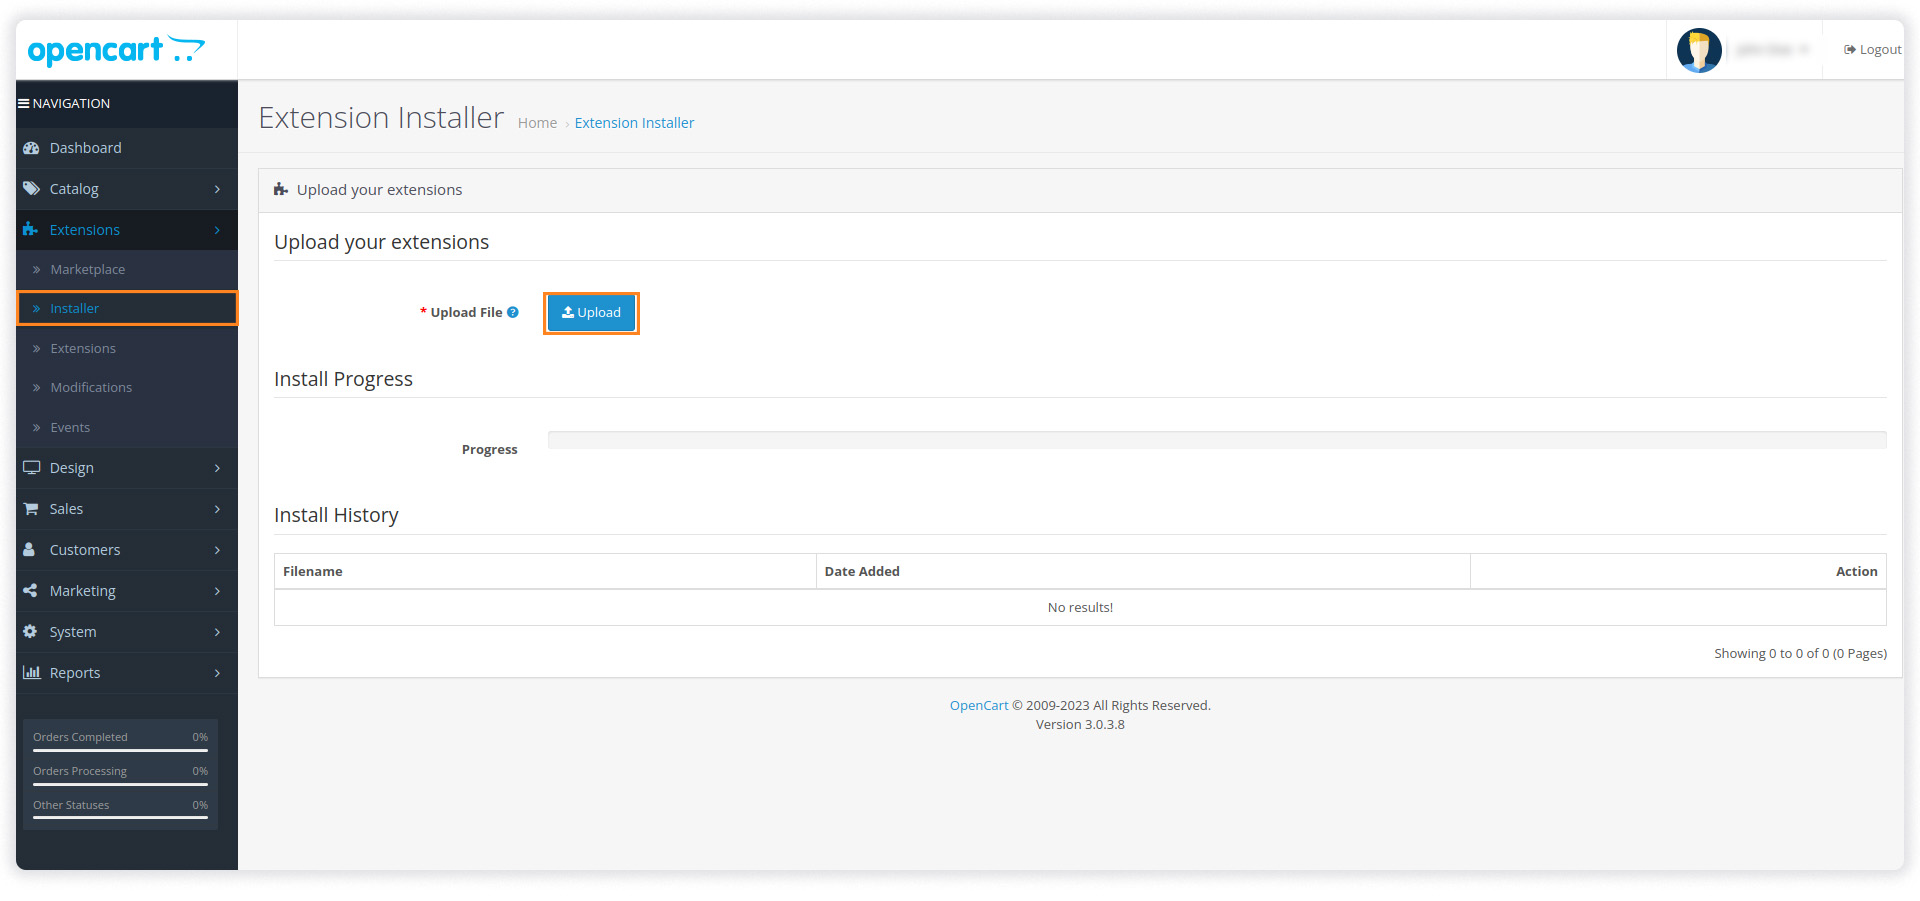

Method 2 – Using FTP:
You can also install Capturly by uploading the plugin through FTP.
STEP 1 Create an FTP user in a Virtual Server environment using the control panel STEP 2 Download the Capturly plugin for Opencart STEP 3 Upload the contents of opencartplugin.ocmod.zip to the root directory of your Opencart installHow to implement Capturly on Wix
Wix is a free cloud-based, online website builder platform, that lets you build beautiful, responsive websites in a drag and drop style. Users can even add functionality such as plug-ins, e-commerce. It provides customizable templates, graphics, galleries, fonts and many more.
If Wix is absolutely new to you, their help center provides all the information you need, to get started. The getting started with Wix guide takes you through the whole process step by step.
If you decide to run your website on Wix, please follow these steps to add the Capturly tracking code to your website with it:
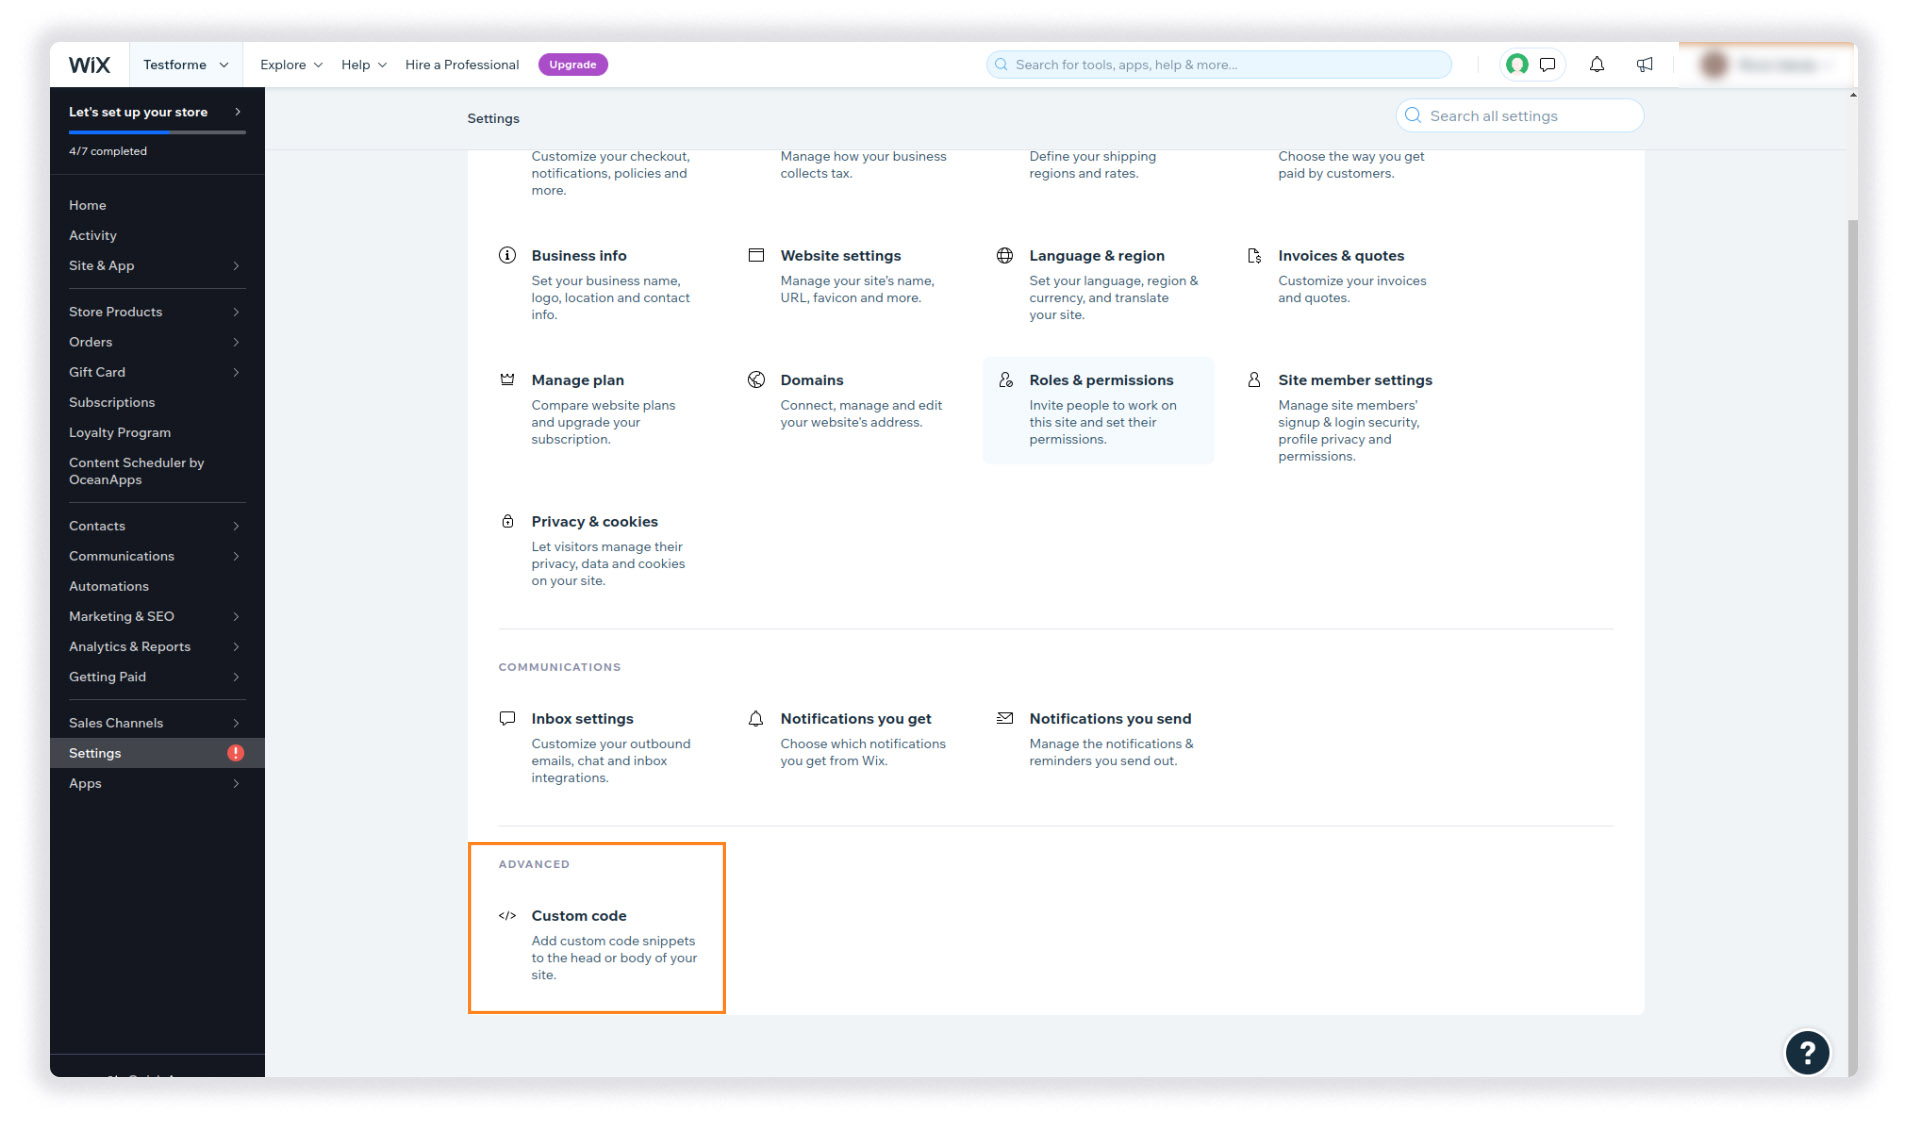
STEP 1 Log into Wix and go to My Sites on the top menu, then select your website. STEP 2 Pick Settings on the left panelSTEP 3 Click on Settings and under the Advanced settings select Custom code
![]()
STEP 4 Click on New Tool on the top-right section, then choose </> Custom from the dropdown menu
![]()
![]()
![]()
Name the code, this can be anything you desire e.g. Capturly Tracking Code or just Capturly
STEP 8 Choose the Body – end option from the radio buttons under the “Place the Code in” label and click on Apply
How to implement Capturly on Squarespace
Squarespace is a free cloud-based, online website builder platform, that lets you build beautiful, responsive websites in a drag and drop style. Users can even add functionality such as plug-ins, online store support. It provides customizable templates, graphics, logos, fonts and many more.
If Squarespace is absolutely new to you, their help center provides all the information you need, to get started. They also have a well-documented guide and videos for the best onboarding experience.
If you decide to run your website on Squarespace, please follow these steps to add the Capturly tracking code to your website with it:
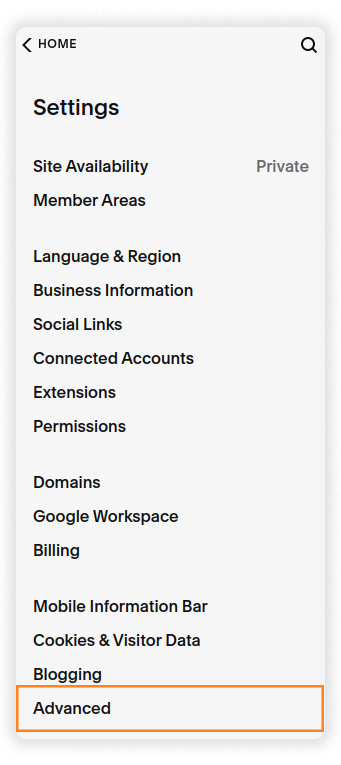
STEP 1 Log into your Squarespace account and Pick Settings on the left panelSTEP 2 Go to the Advanced menu
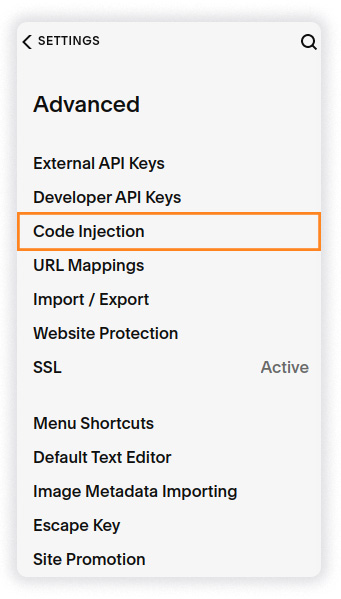
STEP 3 Click on Code Injection
STEP 4 Copy Capturly tracking code after logging into Capturly
![]()